RVs are a great way to travel and explore the great outdoors, but RV power issues can quickly put a damper on your adventures. From flickering lights to malfunctioning slides and awnings, electrical problems can be frustrating and difficult to diagnose. However, with the right knowledge and tools, you can troubleshoot and fix common electrical issues in your RV. In this article, we will provide you with 10 things you can check related to your RV power issues.
1. Checking the Battery Switch
The first step in troubleshooting electrical issues in an RV is to check the battery switch. The battery switch is usually located near the RV’s battery and is responsible for turning the battery on and off. If the battery switch is off, the RV’s electrical system will not work, even if it is plugged into shore power. To check the battery switch, locate it near the battery and make sure it is turned on. If it is off, turn it on and check to see if the electrical system is working properly. If the battery switch is on and the electrical system is still not working, the issue may be with the battery itself.
2. Examining the Converter for RV Power Issues
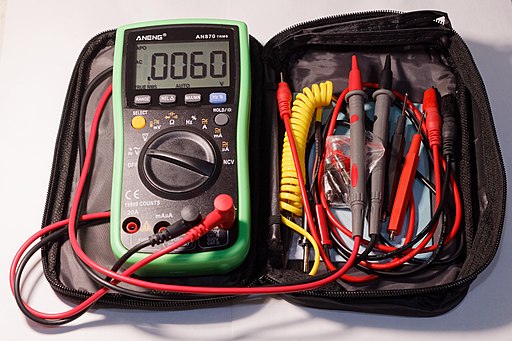
The converter is responsible for converting AC power from shore power or a generator into DC power to charge the RV’s battery and power its DC electrical systems. If the converter is not working properly, the battery may not be charging, and the DC electrical systems may not be working. To examine the converter, locate it in the RV and check for any visible signs of damage, such as burnt wires or a blown fuse. If there is no visible damage, use a multimeter to check the voltage output of the converter. The voltage output should be between 13.2 and 14.4 volts. If the voltage output is too low, the converter may be defective and will need to be replaced.
3. Testing the Reverse Polarity Fuses
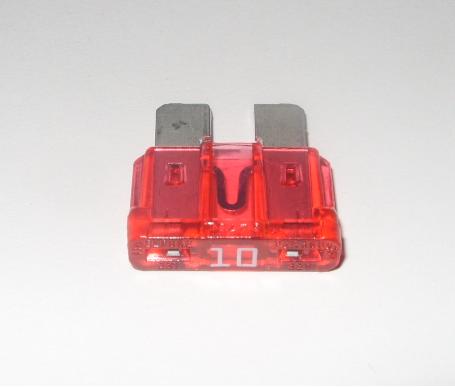
The reverse polarity fuses are responsible for protecting the RV’s electrical system from damage caused by incorrect polarity. If these fuses are blown, the RV’s battery may not be charging, and the DC electrical systems may not be working. To test the reverse polarity fuses, locate them in the electrical panel. They are usually two 40-amp automotive blade fuses located between the 120V and 12V sides of the panel. Check to see if the fuses are blown. If they are, replace them with new ones and test the electrical system to see if it is working properly. Hopefully, this will solve your RV power issues.
4. Inspecting the Ground Wire
A bad ground wire can cause a range of electrical issues in an RV, including flickering lights and malfunctioning electrical systems. To inspect the ground wire, locate the ground wire near the RV’s battery and check for any visible signs of damage, such as frayed or corroded wires. If the ground wire looks damaged, replace it with a new one. If the ground wire looks fine, remove the connection to the frame and clean the loop end and the spot on the frame where the ground is attached. Reattach both ends and test the electrical system to see if it is working properly.
5. Checking the Water Level in the Battery
One of the must know aspects of maintaining an RV’s electrical system is checking the water level in the battery. When an RV is connected to shore power for extended periods, the water level in the battery may drop, potentially leading to power issues or even battery failure. If the water level appears low, use distilled water to top off each cell. Avoid using tap water or mineral water, as they contain impurities that can damage the battery.
6. Testing the Battery Voltage to Avoid RV Power Issues

It is essential to test your RV’s battery voltage regularly, especially if you notice any signs of diminished power performance or if the battery is nearing the end of its expected lifespan. By conducting voltage tests, you can identify potential issues early on, allowing you to take corrective action and avoid unexpected RV power issues during your travels. By using a voltmeter, you can assess the battery’s health and ensure it is functioning at optimal levels. A fully charged battery should have a voltage reading between 12.6 and 12.8 volts. If the voltage is lower than this range, it could indicate a defective battery that may need to be replaced.
7. Checking for Loose Connections
Loose connections in your electrical system can lead to a range of RV power issues. These include intermittent power loss, flickering lights, and even damage to your appliances. To maintain a reliable and efficient electrical system, it’s crucial to regularly inspect all connections, including those to the battery, converter, and electrical panel, and tighten any loose connections you may find. Make it a habit to inspect connections during your routine RV maintenance and address any issues you may find promptly.
8. Testing the Alternator for RV Power Issues
For drivable RVs, the alternator plays a crucial role in maintaining the battery’s charge while on the road. If you notice that your battery is not charging properly while driving, it is essential to test the alternator’s voltage output using a voltmeter. Ideally, the voltage output should fall between 13.9 and 14.8 volts.
9. Check Breakers
When we have an RV power issue in our motorhome, one of the first things checked are the breakers. Breakers can trip due to a variety of reasons, such as overloading the circuit or a short circuit. This can cause electrical devices to stop working or even pose a safety hazard. It’s a good idea to familiarize yourself with the location of the electrical panel and the breakers inside so that you can easily access them when needed. Trust me, you’ll go there more than once! If you find that a breaker continues to trip repeatedly, this may be a sign of a larger issue that requires a mobile RV repair technician.
10. Checking the GFCI Outlets
GFCI outlets are a critical component of any electrical system, especially in RVs, where the risk of electrical shock is higher due to the use of water and other liquids. These outlets are designed to detect and respond to a ground fault, which occurs when electrical current leaks from the circuit. When a GFCI outlet detects a ground fault, it will trip, stopping the flow of electricity and preventing electrical shock. To check the GFCI outlets in your RV, locate them and press the “test” button. This should cause the outlet to trip, and the “reset” button should pop out. To reset the outlet, simply press the “reset” button back in. If you find that a GFCI outlet continues to trip repeatedly, this may indicate a more significant problem with the electrical system that requires professional attention. By regularly checking and resetting your RV’s GFCI outlets, you can help ensure that your electrical system is safe and functioning properly.
Ensure Maintenance To Avoid RV Power Issues
Proper maintenance of RV electrical systems is essential to prevent electrical issues from occurring. Here are some tips to help you maintain your RV’s electrical system:
Keep the Battery Charged
Keep the RV’s battery charged by using a battery charger or keeping it plugged into shore power when not in use. A fully charged battery will help prevent electrical issues from occurring.
Keep the Electrical System Clean

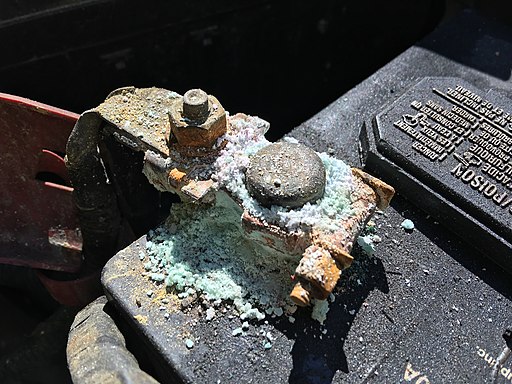
Clean the electrical system regularly to prevent corrosion from building up on the battery terminals and other electrical connections.
Check the Fuses

Check the fuses regularly and replace any blown fuses immediately.
Inspect the Electrical System
Inspect the electrical system regularly for signs of damage, such as frayed wires or corroded connections. Repair any damage immediately to prevent electrical issues from occurring.
Use Surge Protectors
Use surge protectors to protect the RV’s electrical system from power surges and voltage spikes.
Conclusion
RV power issues can be frustrating and difficult to diagnose in an RV. We’ve been there and know just how things can throw a perfectly good trip for a loop! However, we feel following the troubleshooting tips outlined in this article, you can quickly and easily diagnose and fix common electrical issues in your RV. Additionally, proper maintenance of your RV’s electrical system can help prevent electrical issues from occurring in the first place. We hope that by following these tips, you can keep your RV’s electrical system working properly and enjoy your adventures on the road.


